Misconceptions for In-Season Training

There are many misconceptions about in season hockey training for athletes ages 14 to 18. Note: we’re not talking about an NHL player. Programming is completely different for professional players (full grown adults), compared to programming for a developing teenage athlete. This population should constantly be focused on putting on lean mass and getting stronger. If they’re not, then they are missing out on a crucial period of development. 


Common Misconceptions:

·       In season is time to maintain strength (14-21 y/o)

·       Train for speed in the gym (plyometrics and/or sprinting)

·      Train “sport specific” work

·      Don’t squat or deadlift in season

·      Use light weights in season


MISCONCEPTION: In season is the time to maintain strength (14-21).

OUR APPROACH: Developing strength and continuing to put on muscle mass (hypertrophy) are the two most important things for in season hockey players between the ages of 14 and 21.


MISCONCEPTION: Train for speed in the gym (plyometrics and/or sprinting).

OUR APPROACH: Speed qualities are already being addressed. Every shift, every practice, and skill session has a speed component attached to it. It is important to know that although speed is being trained, strength and hypertrophy are not being addressed.


MISCONCEPTION: Train “sport specific” exercises in season. 

OUR APPROACH: There is no need for sport specific work in season. There is nothing more sport specific than being in season.


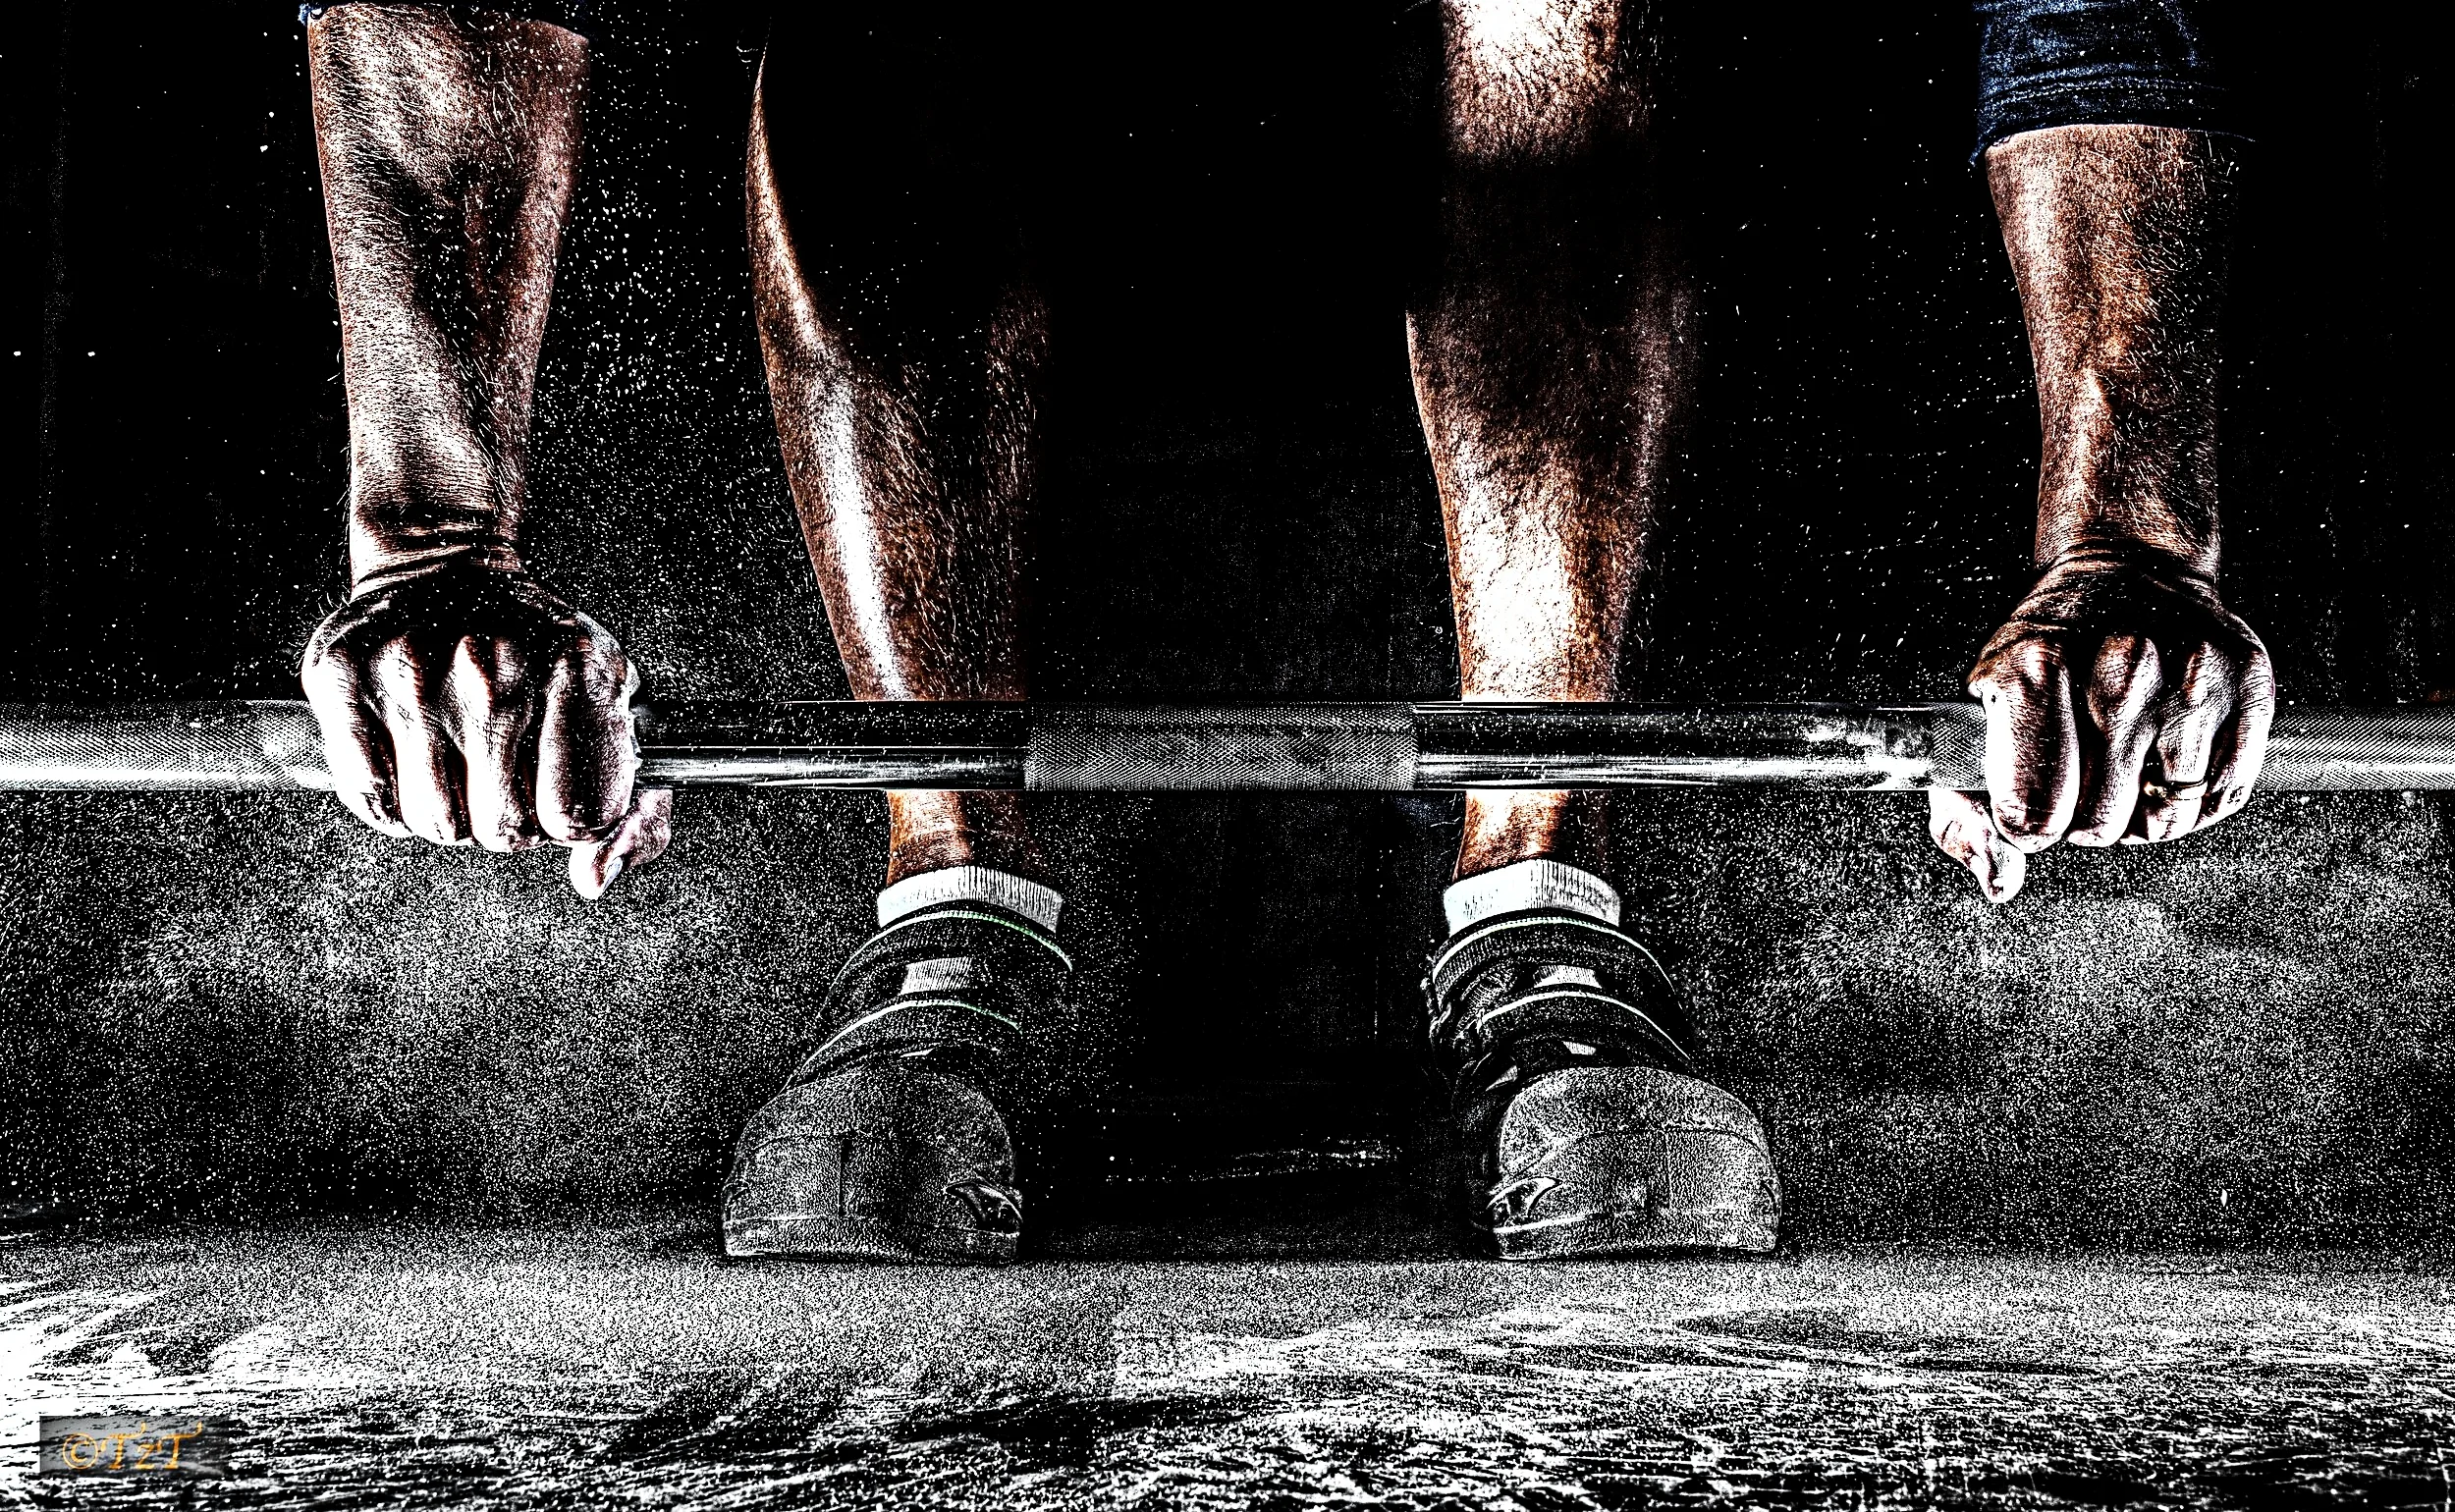
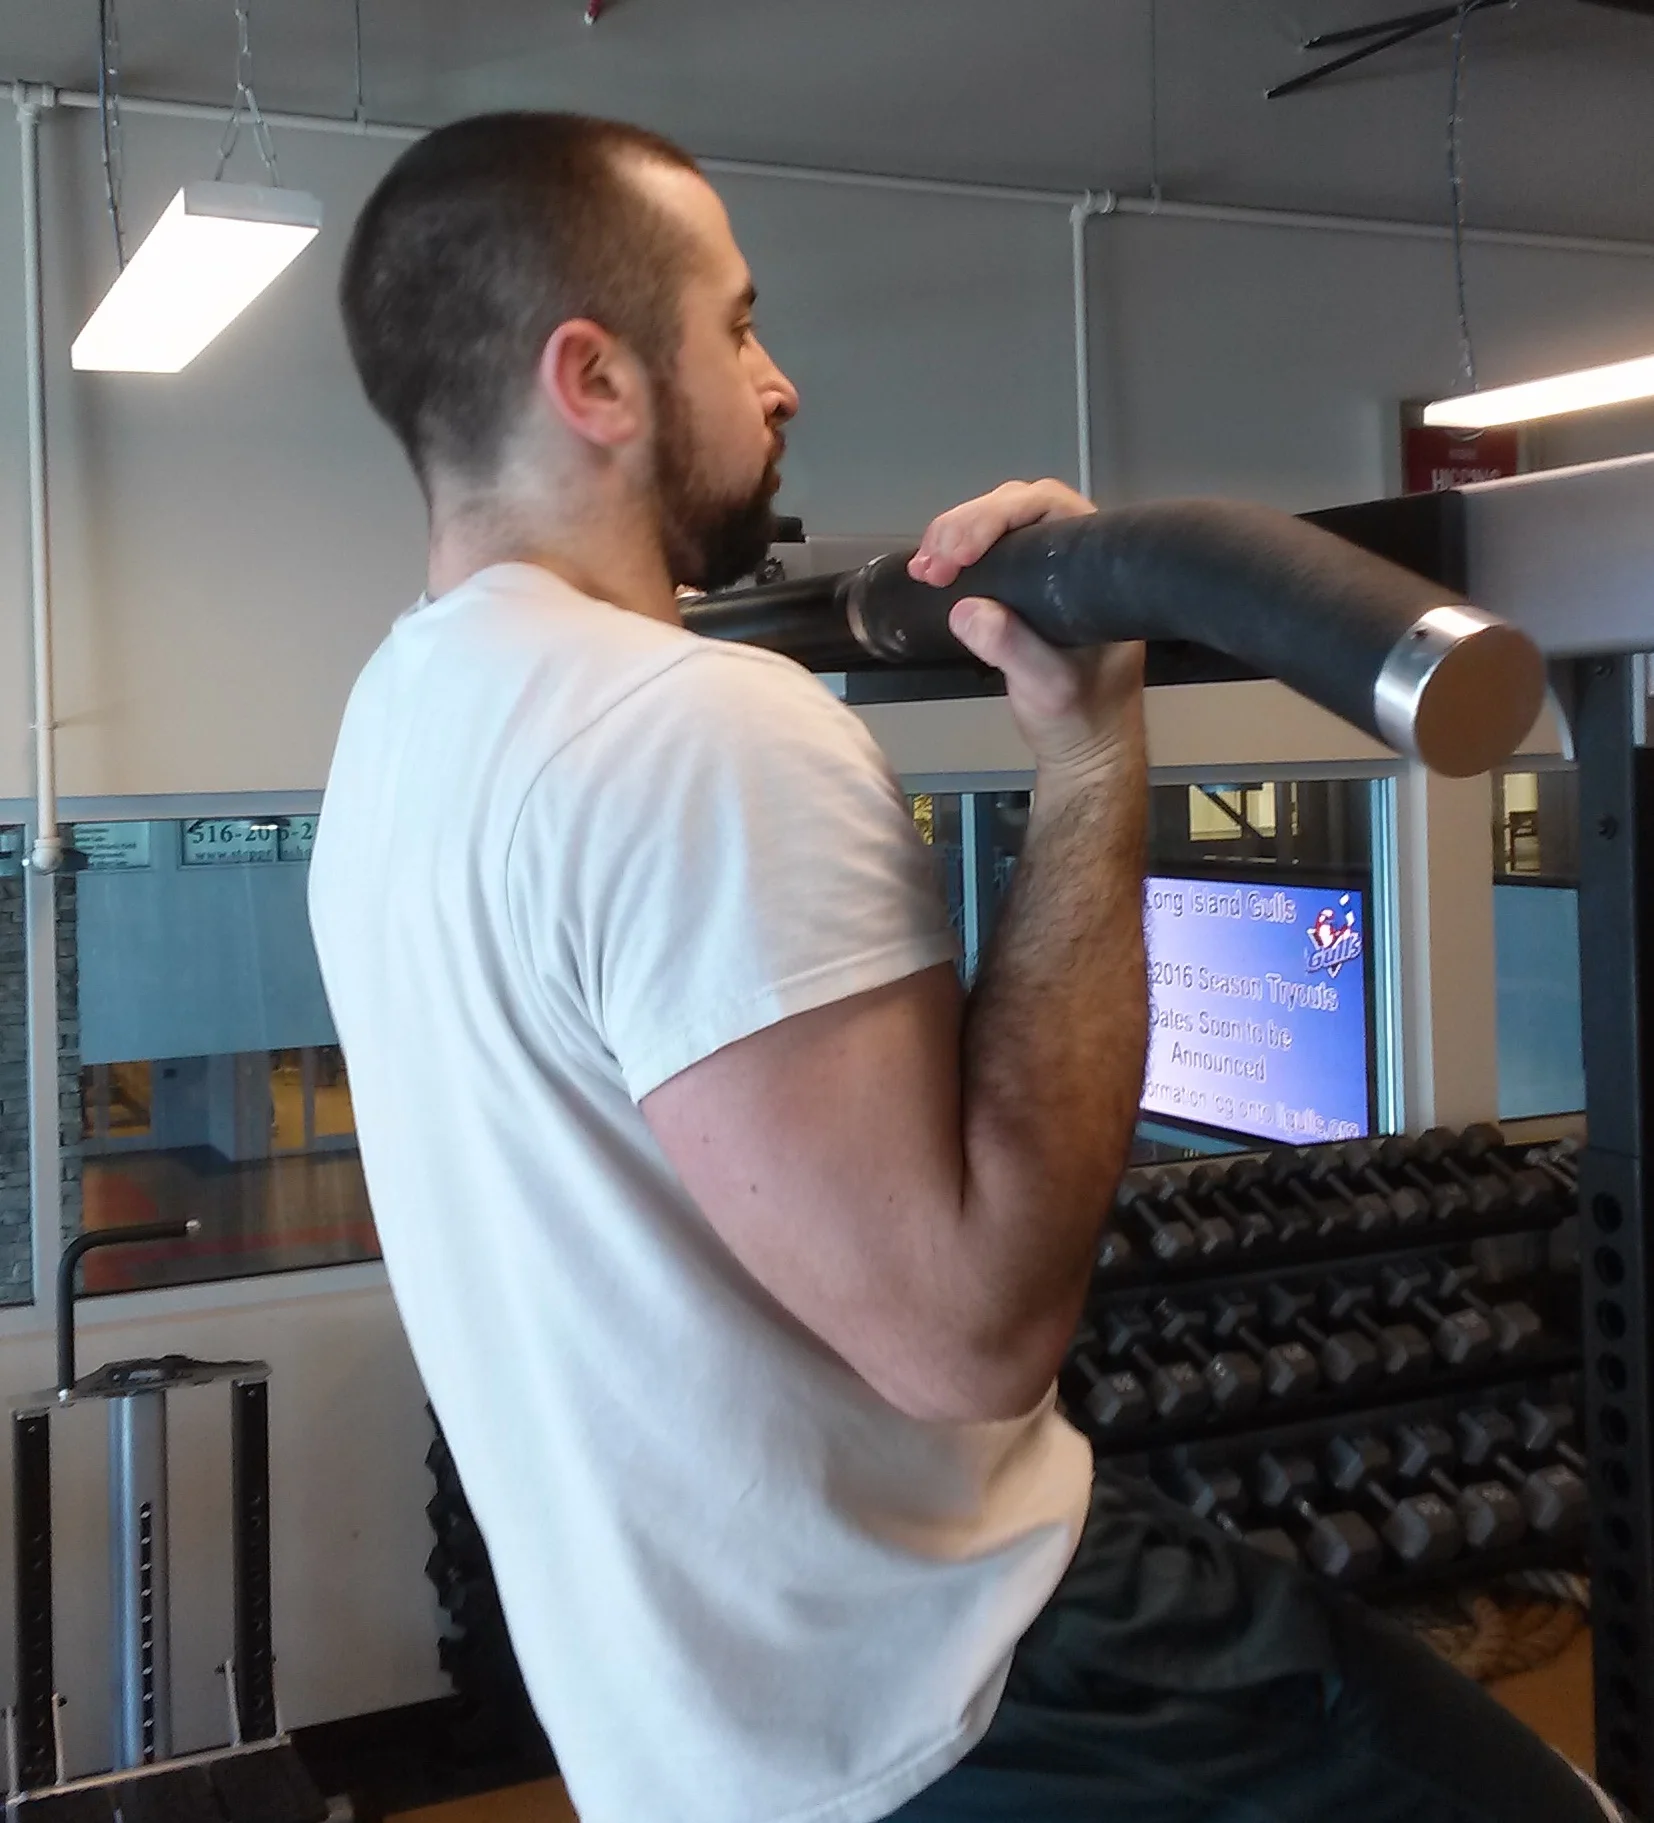
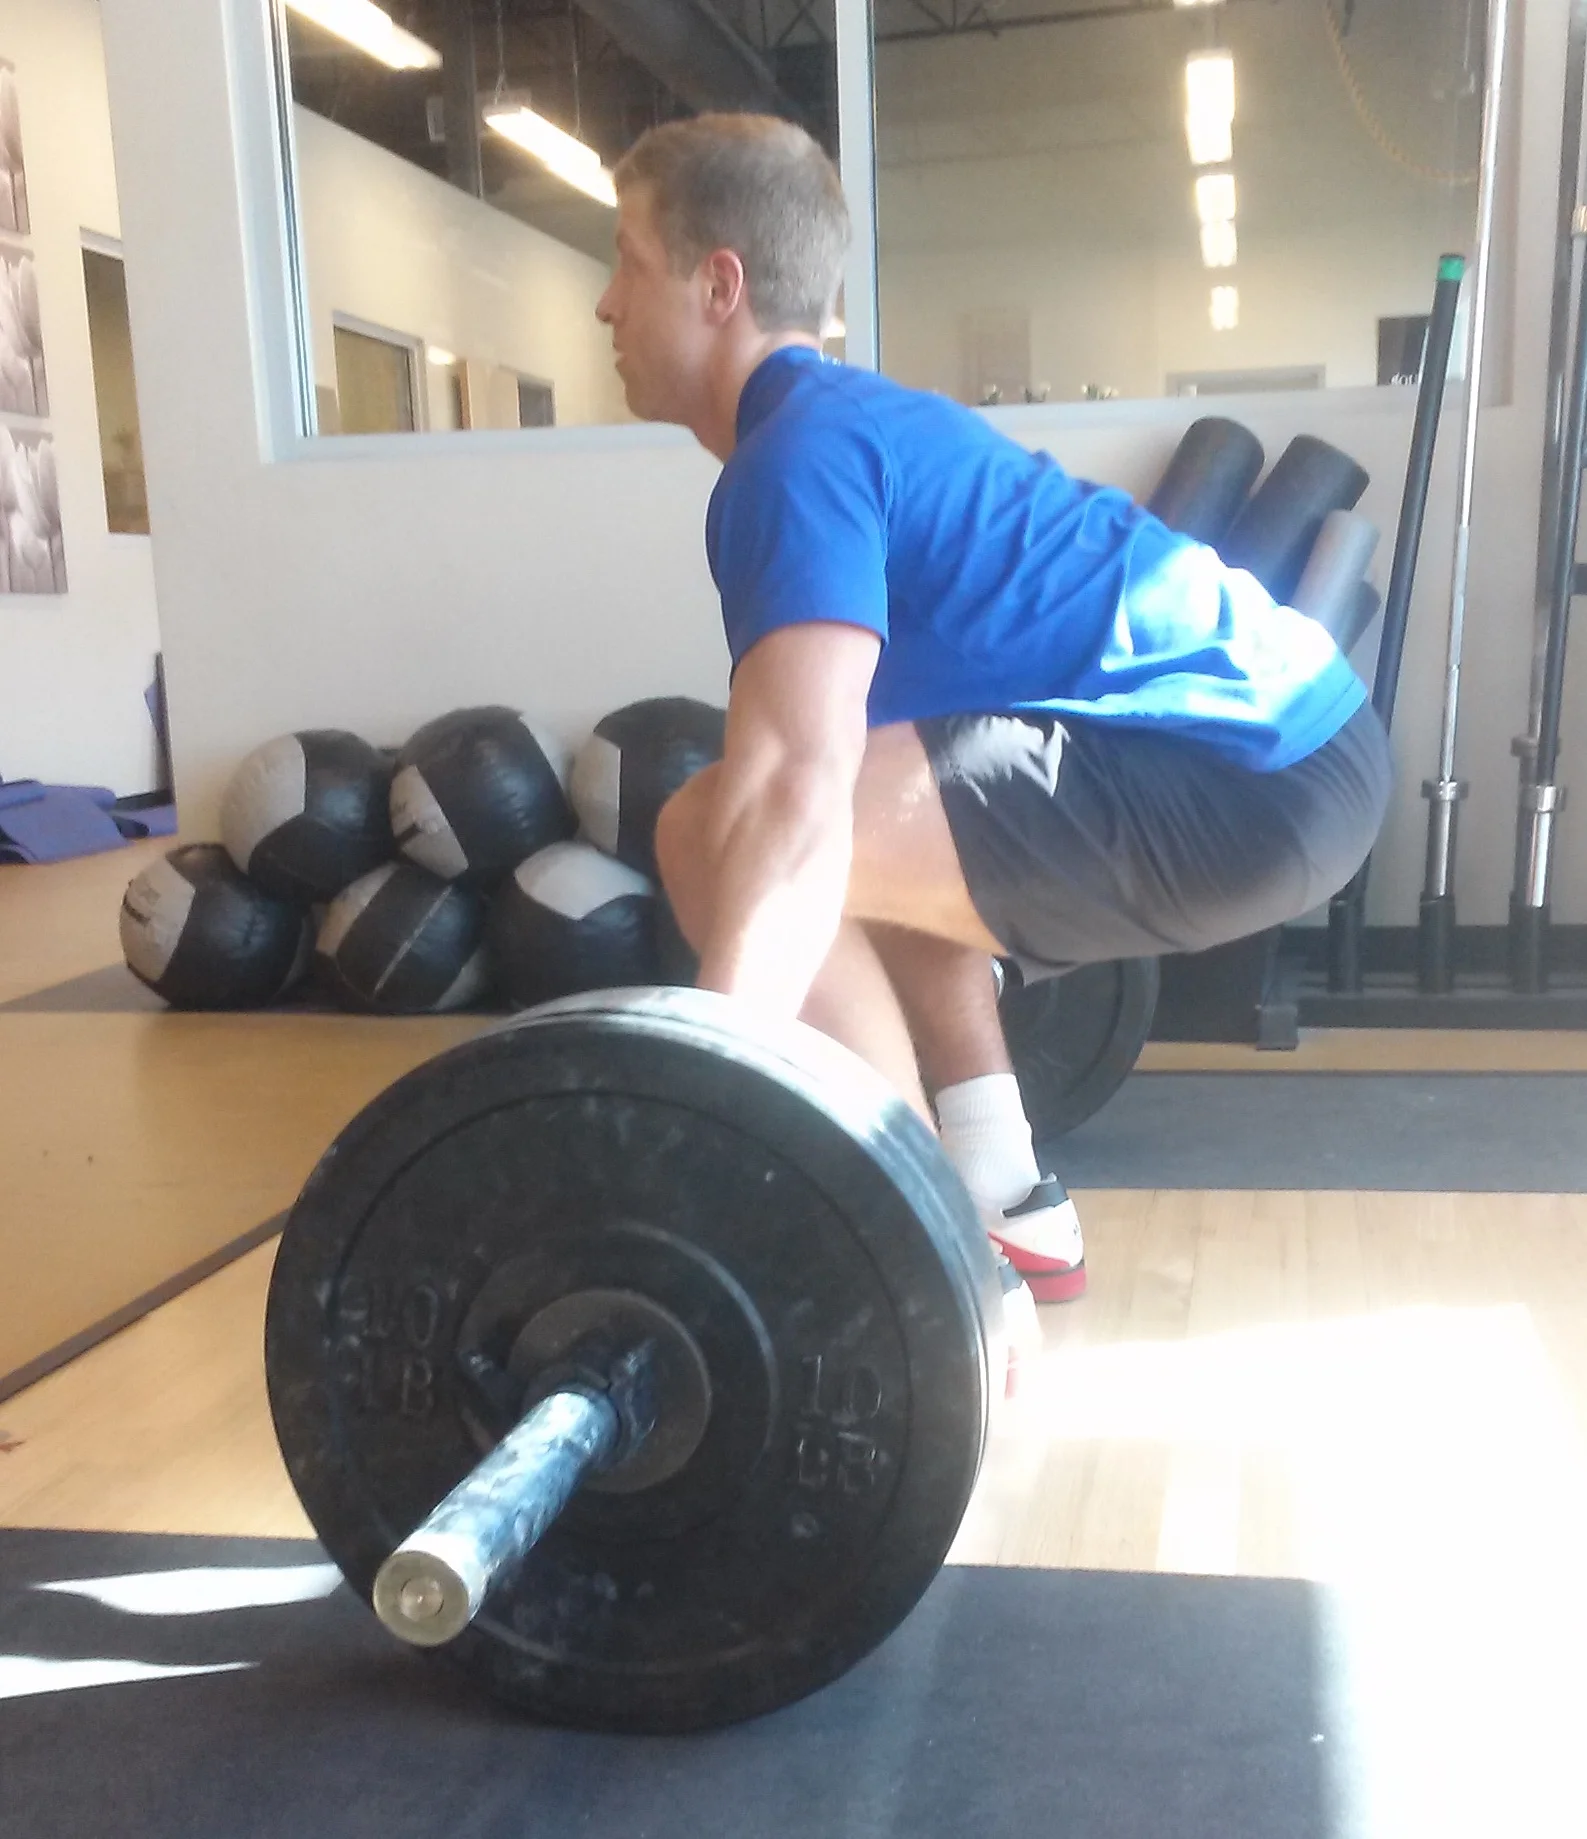
MISCONCEPTION: Don’t squat or deadlift in season. 

OUR APPROACH: Use complex movements. We understand that time is limited. For this reason, our in-season workouts are programmed with exercises that give you the biggest bang for your buck. Exercises such as squats, deadlifts, presses, chin up variations and Olympic lifting variations will do just that. The reason being is that when athletes train these movements, they also work secondary muscles as well.


MISCONCEPTION: Use lighter weights and take off from lifting while feeling rundown during the season.

 OUR APPROACH: Frequency (days per week) and intensity should remain constant. The one variable that can be manipulated is volume. Volume (sets) can be decreased based on how the athlete feels.Simply decreasing the weight will compromise the intended result. That being said, it is important to know that every exercise has an effect. Athletes who are feeling rundown should decrease the total number of sets (volume) while maintaining the weight (intensity). This will ensure that you will get the results you’re looking for.

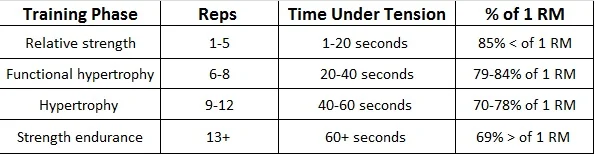
The number one cause of injury is fatigue. The goal is to keep our athletes fresh, healthy, and energized throughout the season. We take our workouts day by day, week by week. We do so by communicating with our athletes prior to every workout. It is important for each athlete to be honest with themselves and for coaches to be flexible with their individual assessment. We use the table presented below to manipulate the workload for the day. 

Screen Shot 2020-02-11 at 7.15.08 PM.png

When our athletes express that they have low energy, aren’t recovering well, and/or are rundown, we reduce the number of sets (volume) – NOT THE WEIGHT (intensity). All other variables remain constant: reps, rest, weight. Below are two sample exercises, one for strength and one for hypertrophy. Athletes are required to complete 3, 4, or 5 sets of snatch grip deadlift or 2, 3, or 4 sets of back squats. Both programs hold all other variables constant regardless of the number of sets.   

Screen Shot 2020-02-11 at 6.41.47 PM.png

New Videos and Newsletter!!

Check out our Instagram for new videos on all things I3E. See some of the athletes we have had the privileged to work with, and also pick up some new tips and ideas for program design!


Subscribe to our mailing list for updates on what were doing and to get notices about new videos!

* indicates required

Need For Speed

Need For Speed

Speed has multiple factors that can be built upon to create a faster athlete. Some of these factors can be influenced and others cannot, in this article we define these factors to help you understand how to improve hockey speed. 

The GHD and Its Benefits For Hockey Players

The glute ham device (GHD) is a piece of equipment we use often with our players. This machine works on building the hamstrings, glutes, and calves, aka the keys to great triple extension/speed. Triple extension is the rapid extension of the ankle, knee, and hip joints-the stronger the triple extension by an athlete the greater the force production. When a player can create more power in their lower extremities the stronger & faster they'll be on their skates.

trip.png
Screenshot_2015-11-14-15-16-28-1.png

If you analyzed hockey players lower extremities alone you'll see two common muscle deficiencies.

  1. Over-developed vastus lateralis and under-developed inner quad muscles.

  2. Over-developed glutes/bicep femoris (outer hamstring) and under-developed semi tendinosis/membranous (inner hamstring muscles).

In this article we're going to focus on number 2, the under-developed hamstrings. Hamstring and glute strength are correlated with sprint/skating speed, which is why it's important to have both equally developed and strong. The GHD works to elongate the hamstring and create a contraction using body weight and added resistance (if applicable). Think of it as a bicep curl for your hamstring.

When performing the GHD there are a few key points to focus on for maximal muscle activation.

  1. Knees should be placed firmly into the larger pad and ankles should be locked into the back pads, feet touching the back platform.

  2. Squeeze your glutes (butt), hamstrings, and core-this will ensure lack of extending the back to compensate for lack of hamstring strength.

  3. Lower yourself while thinking push the hips forward and fully lengthening the legs.

  4. When you begin to feel your back round you're going to go back up to starting position, thinking hips forward and forcing the hamstrings to contract to create the upward momentum.

**There are different forms of GHD, including ways to add varied resistance and different methods for when to stop on the eccentric (downward motion). For this article we'll only be referencing the normal GHD movement.

If performed correctly you'll feel your calves, hamstrings, and glutes tighten up and contract (almost like they're being pulled on & stretched). When starting to implicate GHD into your program we recommend to leave your arms by your side and progress from there: arms across the chest, arms by ears, then added resistance (holding a weight). These progressions will result in proper understanding of the movement and development.

Common mistakes made on the GHD.

  • Arching the head (not keeping neutral), this will take away the weight of your head (10-15 lbs), you're losing resistance by doing this-don't do it!

  • Hyper-extending the back, this will take away work from the calves, hamstrings, and glutes by shifting force into the wrong areas being focused on, changing the levers.

  • Performing to fast. Make sure you control the movement and work on understanding how different muscles contract and what they feel like; time under tension is huge in muscle strength/size development.

All things being equal the faster and stronger athlete will always win. This being said, make sure you utilize correct lifts to ensure your optimal development. When hamstring development is often lacking in hockey players it should be a point to make them a focus in your workouts. The GHD is one of the best exercises for hamstring development and can be a useful staple for your workout.


Is is okay for kids to workout?

The debate of youth working out has raged for decades, the stunting of growth, increased injury-all worries of a parent or guardian. While science has consistently proven the benefits of working out when performed smart and safely for youth, you still have a small population who says otherwise.

Institue 3's age-specificity training table - ages, physical maturity, and athletic ability dictate which training methods we use for the training aspects on the left.

Institue 3's age-specificity training table - ages, physical maturity, and athletic ability dictate which training methods we use for the training aspects on the left.

Any qualified strength training professional realizes that it's safe for all ages to participate in working out, but all ages have different training needs. At Institute 3e this is our biggest challenge, helping parents understand why/what we do with different ages. Age-specificity is a huge part to our training success, obviously we don't train a 16 year old the same as an 8 year old, every individual has their own needs. These needs are determined by...

  1. Athlete's age - while age isn't the only predictor of training styles used, it's a component of assessing which training needs will be sought out.

  2. Physical maturity - every athlete develops at different rates-this determines the training methods used within their age-specific training style.

  3. Athletic ability - not all athletes are created equal, methods will vary according to ability, this aspect often goes hand in hand with physical maturing.

Every athlete has their own needs, every athlete requires varied instructions and exercises fully dependent on their abilities. Aside from improving already developed skills we always stress the importance of putting in the work at a young age. Accumulation of training years is huge for a young athlete's future success.

So does lifting cause stunting of growth and increased injury?

When you play a sport there is already an inherent risk of injury, strength training does not increase one's risk for injury when used properly. In a review performed to assess strength training in children and adolescents multiple factors were assessed and found.

  • Injury - Any form of injury was always related back to misuse of equipment or lack of supervision. At Institute 3e we have multiple trainers working with every team to ensure safety and proper form. Along with this, we take a lot of time going through progressions to ensure proper form and movements are learned/adapted to.

  • Strength - It was found that children/adolescents can improve their strength anywhere from 30-50% after 8-weeks of training consistently (strength %'s vary by athlete). Strength at Institute 3e doesn't just mean moving weights, it means moving the body in a stronger way. For example, a lot of our athletes have trouble climbing the rope their first visit, after coming consistently climbing the rope becomes easier and attainable. This is a form of tracked progress for us, methods we're using have made your athlete stronger in a safe way.

  • Denser bones, stronger tendons, muscles, and ligaments - In a study examining the positive effects strength training has on youth 9-10 years old, bone and lean mass both increased. While some mass change was associated with normal growth, it was seen that strength training helped increase normal rates in a healthy manner. When muscle and bones get stronger the tendons and ligaments will do so as well.

  • Growth plate injuries - In a review assessing youth/adolescent growth plate injuries it was observed that sports and poorly made programs played a large part in injuries. While some injuries an unavoidable and purely accidental, there are countermeasures that can be taken to decrease injury prevalence. The countermeasures noted in this review involve: smart coaching, individual programming, and attention to individual's needs (health & physical). All aspects we commonly practice at Institute 3e.

When playing sports and working out there will always be risk of injury, especially in high-speed contact sports. The most important aspect to healthy growth in younger athletes is careful supervision and well-designed exercise programs. We make it a point to structure our workouts to an athlete's age, physical maturity, and athletic ability to ensure safe and optimal growth.


Why Hockey Players Should Be Squatting

Squatting is deemed as one of the best exercises for lower body strength and overall muscle development. Younger athletes can especially benefit from squatting, this movement will help increase range of motion (when performed properly) and build leg strength with stability for the future. When squatting there should be an effort to achieve full-depth, this will ensure for optimal growth and strength gain.

Hamstring and calve contact should be made to ensure full-depth is being achieved. The chest should remain tall without the lower back rounding. Toes angled slightly out, while driving the knees out to create a hole to sit into. Head is in a neutral…

Hamstring and calve contact should be made to ensure full-depth is being achieved. The chest should remain tall without the lower back rounding. Toes angled slightly out, while driving the knees out to create a hole to sit into. Head is in a neutral posture, and arms are tight enough in on the bar to create a shelf with the traps for the bar to sit on (this picture is a high-bar Olympic styled squat).

So why should hockey player squat? Let alone go to full-depth?

  1. Most bang for your buck: by achieving good form in a full-depth squat you're creating the most response possible in the muscles being worked. When you cut depth out you lose stimulus in muscles being targeted, for example, you'll miss out on musculature used to create increased hip drive from the bottom position. In short, the deeper the squat the higher the neuromuscular response will be; facilitating the most muscle fibers being stimulated.

  2. Joint stability: there's no debate that being able to maintain good posture with weight on your back will increase joint stability. The ankle, knee, hip, lower, mid, upper back, etc. will all benefit by handling weight through various ranges of motion. In hockey the back and lower body joints are in constant stress from skating and taking hits, stronger joints will help prevent injuries and instabilities. In hockey you're constantly hunched over skating, stronger (lower back/hip) joints will help improve your athletic posture and strength.

  3. Mobility: the best way to mobility/flexibility is to keep your mobility and flexibility. When you perform squats to full-depth you're putting yourself into positions that may not be achieved without weight. This will result in adaptation and will help increase your mobility to create the correct postures through the squat. Hockey players usually have tight hips from skating, squatting can help increase hip mobility by going to full-depth.

  4. Increased vertical jump/sprint speed aka explosiveness: we know vertical jumps and sprints all require aspects of power. Full-depth squats will help you do both of these better by facilitating more muscle fibers being worked, like stated above. This will have a crossover with your skating, the increased ability to produce power, the faster the ability you can skate/move.

Those 4 points are all an athlete can dream of: increased muscle/strength, reduced injury, stronger joints, more power, improved mobility. Squatting is a tool that shouldn't be overlooked, the earlier you start the better off you'll be for the future. If you're new to squatting and don't have access to proper coaching-check out the two videos below, the first is a video from Mark Rippetoe on back squatting and the second is from Charles Poliquin with tips on front squatting.


Making Movement Better

In a previous article we discussed the commonality every professional and elite-level athlete possesses. That of course was the accumulation of training years, a simple concept that states: the accumulation of time spent working and practicing a skill, the better/higher reward will be for the future.

The concept itself is simple, but what goes inside those years to create that accumulation? Is there another key that elite-level athletes possess? The answer is...yes, that is their movements patterns.

Every athlete that has ever had great success in their trade all have fundamentally developed movement patterns. These are the way one moves their body through time and space, but they don't just move, they move in a way that creates an optimal response. A huge key to success is learning this skill at a young age, the best athletes/lifters are those who understand their body. They pickup verbal cuing faster, they adapt to movements quicker, they create better ways to facilitate a response from the task at hand, and they possess body awareness.

At Institute 3e we make movement patterns a huge focus for our youth athletes; but why? Like discussed in our age-specific training article, there are points in an athlete's life when learning certain skills become almost impossible. We use animal flow with our younger athletes to improve their movements patterns and here's why...


  1. Locomotive skills - these are skills that can only truly be developed at young ages, this is the ability to coordinate limbs together in an optimal way (ex: crawling, running, skipping, animal flow movements, etc). An athlete who doesn't understand their body and how it specifically moves will have a harder time picking up on sport-specific movements and lifting patterns.

  2. Body awareness/propreoceptiveness - this is understanding where your body is at any point in time, an athlete will understand how to move to create an asked response. For example: if an athlete is back squatting they understand why and where they're moving the bar, they can quickly grasp what they should be feeling and how to move to achieve the best results.

  3. Improved mobility - the best way to stay mobile and flexible is to never lose mobility and flexibility. Animal flow demands the body to move in different ways to stretch and improve the body, which will carry over to other athletic aspects.

  4. Range of motion increase - maintaining flexibility and mobility is important, but so is improving them. Animal flow will do so by creating a specific movement demand that may not already be possessed by the athlete, aka increasing their range of motion.

  5. More coachable - as an athlete grows their demands become greater and more in-depth. A coach needs them to do progressively harder tasks as competition becomes greater, if you understand your body and move to your best ability-you better believe you'll be easier to work with. There will be no time wasted teaching basic movements, you already possess them.


The bigger picture - if there's one point to be taken away from this article, it's being able to see the bigger picture. Once certain ages/times of development have passed, certain skills are near impossible if not completely impossible to learn. Development needs to start at young ages, while you think its just another youth focused drill; you're wrong. Every bit of time practicing these skills at young ages act as bricks, these bricks create entire athletic foundations. Younger athletes are especially important, it's easy to learn a movement, it's hard to understand a movement.

Rest Times and Their Usefulness

Every well constructed lifting program all have one thing in common: delegated rest times. Rest times are incorporated to facilitate different training results. A solid program will have a correlation between rest times and the type of strength being trained for. For example, if you're lifting in the "relative strength" phase where you're hitting heavy 3 rep squats, you're going to have a longer rest. The longer rest is needed for better recovery; the nervous system needs a break to maintain its high level of performance.

Strength table.jpg

There are a few key takeaways when thinking about rest and recognizing its usefulness. A lot of folks in the gym will sit and talk in-between sets and not control their rest, these are usually those without a goal in mind or tracked numbers. Every rest period has a goal, whether it be hit consistent strength numbers or create a fatigue while still moving the appropriate weight. Here's how you should interpret and use rest to your advantage...

  1. Rest period lengths and their usefulness

    • Higher rest periods - 2 minutes+ - their use comes when you're lifting in the relative strength category performing compound movements. Also, if you're performing any form of PAP/contrast training, (the rest after the PAP/contrast movements in reference here) a longer rest is needed for nervous system recovery.

      • Examples - squats, deadlifts, bench/overhead pressing, Olympic lifts, etc usually will require more rest. These recruit more muscles than most lifts and are the lifts most often performed in the relative strength category.

    • Medium rest periods - 60-90 seconds - their use comes when training in the hypertrophy and endurance categories; aka when strength, endurance and muscle size are being trained for. You'll usually see these when you perform accessory lifts (lifts that complement the first compound movement). The 60-90 seconds allow enough rest to maintain a degree of strength, but should create some form of fatigue to facilitate growth.

      • Examples - dips, incline dumbbell presses, chin-ups, GHD, etc...movements that don't tax the system as heavily as compounds and usually have higher rep ranges.

        • Exception: when compounds are performed at higher reps/less weight (ex: 8 rep back squat) sometimes rest times may be in the 90ish second category-this is often used for beginners.

    • Shorter rest periods - 10-60 seconds - you'll usually see these used when performing training circuits, agonist/antagonist training or various forms of PAP/contrast methods. When circuit training you're doing multiple movements quickly after another, typically full body. Circuits are often used for fat loss and strength adaptation, high level of work within a short amount of time. Agonist and antagonist are opposing muscles, ex: a press then a pulling movement. PAP/contrast are when you train the same muscles quickly after one another, their use is to overload muscles by varied intensities.

      • Examples - circuit (hex deadlift, dumbbell row, GHD, incline dumbbell press, dumbbell curl all performed 45 seconds after one another), PAP/contrast performing a 3-RM back squat with 10 second rest then doing 6 reps of vertical jump.

  2. Be honest - when there's a rest time written in a program try to follow the delegated time. These times are made to facilitate different forms of growth, if you're constantly taking off or adding time then you're changing your true numbers.

  3. True numbers/progress - rest periods can help ensure you're recording more accurate progress. Like stated above having loose rest periods can influence how much weight you're actually able to move at that given time for the asked rep range.

Whether your goal is fat loss, strength gain or muscle gain rest periods are an easy variable to manipulate for results. Rest periods should always correlate with the lift and the reps, without these two factors strategic rest periods will not be as effective.

Why Tempo Matters

A lot of our athletes are familiar with tempo (the 3010's etc you see in programs), but do you understand why we use them and why they change?

Tempo involves creating a time frame for each part of the lift, the eccentric (downward movement), the concentric (upward movement) and holds at the top and bottom. This in return varies the muscle's time under tension, the time under tension will facilitate different results and adaptations. To help you understand better, we made a list of why and how to interpret tempos--this way you can utilize them in your training.

Let's look at a tempo that appears like this....3-1-1-0

  1. The first 3 is the eccentric count, so a three second descend (lowering phase) in a back squat.

  2. The second 1 is the hold at the bottom of the eccentric phase, so this calls for a 1 second hold at the bottom position of the back squat.

  3. The third 1 is the concentric phase, the upward motion or contraction phase-in this example you would stand up at a rate of 1 second from the back squat.

  4. The fourth 0 is the top of the concentric phase (top of the movement), this calls for a 0 second stop between each rep at the top of the back squat, no break in-between reps.

Now that you have an understanding of how to read and interpret tempos, here's how changing them can be beneficial and why we do so.

  • Easy to track - using a set tempo ensures every rep is the same, you're not haphazardly moving weight at different speeds every lift (which would effect results/true progress).

  • Different muscle types stimulated - fast and slow twitch muscle fibers respond differently to different stimulus's, everyone has both types just in different amounts. Fast twitch respond better to heavier explosive movements, while slow twitch respond best to slower more prolonged movements.

    • A tempo that involves a lot of 1's and X's calls for more explosive phases stimulating fast twitch fibers, while numbers like 3-4+ and excessive holds will help recruit/build your slow twitch fibers (generally speaking).

  • Increased muscle growth - when you focus on time under tension you're providing a calculated stimulus to the muscle. This in return will create more protein synthesis (which we covered briefly here) which will result in increased muscle size/growth, moving weights at inconsistent tempos can slow this process.

  • Planned training phases - all workouts should have a common goal behind them, tempos allow support a more thought out plan to reach this goal. For explosive strength increases you'll usually see lower reps and faster tempos and for muscle size/strength you'll see higher reps and longer time under tension. Together time under tension and reps performed will dictate results, use the guide below as a reference.

    • Relative strength – reps 1-5, time under tension 1-20 seconds and 85% or greater of 1 RM

    • Functional hypertrophy - reps 6-8, time under tension 20-40 seconds and 79-84% of 1 RM

    • Hypertrophy - reps 9-12, time under tension 40-60 seconds and 70-78% of 1 RM

    • Strength endurance - reps 13+, time under tension 60+ seconds and 69% or less of 1 RM

Tempo is a great tool for increasing strength when used correctly. A well designed program has respect for these principles and utilizes the science behind them.


No Belt, No Straps

When we work with athletes we don't use weight lifting belts, nor straps. Like everything, there's a time and place for both, although, we have reasoning for not employing these for our athletes. If you use belts and straps-hear our reasoning out and try avoiding them for a few lifts.

Beltless.png

Belts are often used by elite olympic lifters, powerlifters and bodybuilders. There focus is to help maintain compression through the abdominal area (stomach) and to help prevent injury when working with heavy loads (usually 85+% maximal weight) by taking some of the force off of the body. We choose not to use them for our athletes and here's why...

  1. Foundational strength - most of our athletes are building their base of strength, using a belt could hinder their natural growth.

  2. True numbers - a belt might enable an athlete add more weight than their body is ready for, this will then lead to misinterpreted 1, 3, 5, + rep loads.

  3. Back/core growth/strength - the back/core need to have a base of strength before anyone should be worried about finding their maximal weight. By not using belts your back and core will learn to support weight on their own (and grow faster).

  4. Non-transferable - in most athletics it's not realistic that there will be a compressional force on the abdomen when performing, using a belt in the weight room could take away from lifting/performance carry over.

  5. Risk/Benefit - when pursuing true 1 rep maxes there is always a risk of injury, most athletes don't need to find TRUE 1 rep maxes. Their max without a belt should be the max used to assess other reps.

Belts have their time and place, for most athletes they're unneeded-it's a safer/better bet to build strength without them, especially in younger athletes. In regards to straps there is a littleuse for them in our gym, but we have a strong case as to why we don't employ them in 99% of cases.

  1. Grip strength - grip is a limiting factor, meaning you can only handle a weight your grip can handle. Always strapping up to make a lift will hinder grip strength and improvement, which a hockey player needs.

  2. Forearm/hand growth - constantly strapping up will take away from natural growth of the forearm/hand musculature. When you're constantly holding a stick and having others test your strength on the puck you need a strong grip.

  3. True numbers - not using straps will help keep you true to what needs work, this usually being grip!

When building a solid base of strength you'll benefit more by avoiding the constant use of belts and straps. The back and core need to be strong, especially in hockey-you'll have better gains by not relying on a belt. Vice versa a hockey player needs a good grip, straps can hinder the growth and strength of a grip.

The Commonality Every Elite Athlete Possesses

There's one commonality that every elite athlete possesses, it's something that could be argued as the most important aspect to their success. This commonality is called...accumulation of training years.

We stress this concept so often to our athletes and their parents-if you want future success you have to put the time in now. Accumulation of training years is the concept that all of the years/time spent practicing your skill will lead to the best/optimal athletic result. Think about every pro athlete you follow, how often do you hear them say, "Well I started when I was 14." You don't. They start young, they practiced forever and put in the work, which correlates to their success.

No athlete plays a sport not wanting success for their effort, which is why we push for younger athletes to start learning basic concepts early. The picture below shows our table of critical age periods of trainability - this table illustrates which age level will benefit from different forms of training. Every age has their optimal times to learn different skills. For example, think about a skill like coordination and a midget aged athlete - if a midget didn't take the time to develop coordination at a young age it's incredibly hard (if possible at all) to catch up to someone who started when they were 5.

A lot of times younger athletes don't realize how much the drills and practice is building towards their success, every time they're in the gym it's building their foundation. As trainers it's easy to see which athletes started at a young age, even when we're teaching exercises/lifts athletes don't have previous experience with.

For example, teaching a back squat - if you took two athletes, one who's been in the gym and worked their flexibility, body awareness and understands basic movements and the other none of the prior, 10/10 times the athlete who understand basic concepts will learn and develop the move faster. This again can be linked back to accumulation of training years, it's the lump sum of training/athletic experiences that weighs heaviest on future success.

Every concept learned and worked on will correlate to an advanced future concept. Body awareness is linked to better lifting (understanding movements/verbal cues), basic plyometrics correlate to explosive power/strength, the list goes on forever...

Athletic success has one commonality, it's the total amount of time spent practicing and training your trade. Start working today to build your future, every day counts.

Institute 3E In-Season Training Ideology for Older Athletes

There's no question that in-season and off-season training styles should be different. First of all, in-season the goal is to perform your sport optimally and to keep that high tempo through the season. Along with performing optimally it should be a goal to maintain the strength and size gained in the off-season.

If in-season the goal is to play your sport at your peak and you took the same training methodology we use in our off-season training it would do harm than good. The body wouldn't be able to repair and recover in time to perform optimally every time you were on the ice; you world more than likely inhibit growth. This being said there are a few training variations we implicate with our older athletes for their in-season training.

  1. Frequency - we recommend for older athletes to lift twice a week. This is an ideal amount to maintain muscle without frying the nervous system and leaving an athlete lethargic or sore for the majority of the week.
  2. Compound movements - every in-season lift we perform focuses on a compound movement as the first exercise. For example, a squat, deadlift, Olympic lift or bench/overhead press will be the initial focus. The compound movements are how we gain the most muscle, when in-season they're also how we maintain the most muscle. Along with this they're a great sign for checking and maintaining one's strength levels.
  3. Work : Rest ratio - a good in-season lift will have emphasis on the rest an athlete is getting in-between sets. If reps are lower, rest is higher to allow optimal performance and to avoid burnout.
  4. Volume - lifts are made to be shorter and to hit a majority of muscles, when skating 4+ times a week a 2-hour lift can severely deplete the body.
  5. Intensity - in-season intensity of lifts are dictated by the volume (reps). This means let the reps dictate the weight, constantly missing reps and going as heavy as possible will impede proper maintenance/growth.

An example of an in-season (functional hypertrophy, maintain size) lift would look like this....

  • A. Back squat, 5-7 reps, 40X0 tempo, 4 sets, 2 minute rest
  • B1. Chin-up, 6-8 reps, 30X0 tempo, 4 sets, 90 second rest
  • B2. Incline DB Bench Press, 6-8 reps, 30X0 tempo, 4 sets, 90 second rest
  • C. GHD, 8-10 reps, 30X0 tempo, 3 sets, 90 second rest

The main concern of this lift is to perform the back squat to the same caliber you did in the off-season. If you can, then it's a good sign that your strength and size is being maintained. The remaining lifts are for maintenance of other facets of strength, usually focusing on multiple body parts since frequency of lift days are kept lower.


Bantam and Midget Training

This post will cover our training methods we perform with our bantam and midget aged athletes. A lot of parents become worrisome when their child begins to lift at this age, they fear stunting of growth, injury, etc.  At Institute 3E we utilize age-specific training, these are points in an athlete's life where they'll be most responsive to different forms of training. 

When your son/daugher lifts with us, the programs and movements they perform are made to create a strong foundation (progressive to their skill level) and to aid them for more elite lifting as they get older. 

There is a term in the strength and conditioning world called, Accumulation of Training Years–an essential piece to an athlete's continuous success. What this means is an athlete that has multiple years training and working on their skill will be better and more prepared than those who don't. This is why learning fundamentals and building a base of strength is so important for this age of athlete–with higher level play and college approaching you don't want to be left behind by the more experienced. 

The aspects of training we focus on with the bantam and midget aged athlete are...

  1. Speed (reaction time)

  2. Strength endurance

  3. Maximal strength

  4. Explosive strength

As an athlete gets older it will be harder for them to keep up with an elite level player who's had years of experience in the gym. For example, if you're planning on playing juniors and you've never truly back squatted before–you're going to get passed up by someone who's squatted the past couple of years. While they're adding weight and getting stronger...you're working on learning the movement, gaining the mobility and building a base of strength. 

Speed (reaction time) is a huge component we work on at this age group, this aspect goes hand-in-hand with explosive power and strength as well. We'll perform exercises such as, plyometrics (broad jumps, box jumps, vertical jumps), Olympic lift progressions and various team-based exercises such as indian arm wrestling. 

Strength endurance is a key to building an athlete's base of strength, this involves performing a movement for multiple repetitions. It builds the capacity of muscles to handle a larger workload (i.e.more reps) while maintaining the strength of doing so. Examples of this are any strength movement with more than 5 reps (back squatting for 8 reps, incline benching 10 reps, chin-ups max reps). 

Maximal strength and explosive strength while different in many aspects work together in unison in a lot of cases. For example, you won't be able to create a maximal strength effort without some form of explosive strength, vice versa. With a built foundation of basic strength the muscle will be able to handle heavier loads (i.e. less reps, heavier weight) and be able to create more explosiveness. Examples of these aspects include: plyometrics, lower reps-heavier weight movements (a 3-5 rep deadlift) and exercises involving critiqued tempos (holding a front squat for 2 seconds at the bottom, then exploding up). 

An athlete's time at this age should be spent building a good base of strength, this will help improve their performance and keep them ahead of their competition. Higher levels of play call for more speed, strength and endurance–our programs will help prepare your athlete for just that. To get a better idea of the images above check out the video below! 


Peewee Training

In a recent article we discussed mite and squirt training, this article will entail training for the peewee aged athlete. 

In the athletic and strength training world there is something called, "accumulation of training years." In summation this explains that the more time spent training or practicing a skill, the easier it will be to develop as time passes with a better pay off. We realize this and construct programs that are tailored to your athlete's specific age and skill. 

The aspects we focus on with the peewee aged athlete include...

  1. General coordination

  2. Flexibility

  3. Speed (reaction time) 

  4. Speed (movement frequency)

  5. Strength endurance

As time goes it becomes increasingly harder for some skills to be developed by an athlete, if not prefaced at an early age. For example, if a younger athlete can't perform 5 consecutive push-ups, then it will be tougher for them to transition to more advanced lifting and a higher level of play as they age. 

General coordination, flexibility and speed (reaction time) are all keys for elite athletes to develop at young ages. For these aspects we use animal flow (advanced), basic tumbling/advanced tumbling, beginning dowel training, tennis ball drills, advanced agility drills and many more. We also explained these three more in-depth in the mite and squirt post

Screen Shot 2015-09-23 at 11.28.06 AM.png

Speed (movement frequency) is an aspect that has an athlete focus on their ability to maintain a pace with a time demand. It helps preface the athlete by combining cognitive and speed aspects, it develops one's ability to gauge and develop different speeds on cue. Examples of drills we use here are jumping drills, advanced agility/speed drills, various tennis ball movements, jump rope drills and animal flow into tumbling (frog stands/hand stands). 

Strength endurance is an increasingly important skill as your athlete ages, this is their ability to maintain a level of strength over an amount of time. Every athlete should have a base of basic strength at this age, this will facilitate their future transition to advanced lifting. For strength endurance we focus on a lot of bodyweight oriented exercises like, pistol squats, push-up drills, chin-ups, rope climbing, peg board and many more. 

When your athlete trains with us it's more than just going to an off-ice session. It's investing in their future, their future of growth and athletic development. There are aspects of athleticism that become increasingly harder to learn with age, don't miss your athlete's opportunity for optimal growth. To get a better idea of the images above check out the video below! 


Mite and Squirt Training

When parents hear about their athletes training at this age they become worrisome of things usually heard from others (possible stunting of growth, injury, etc.). This article will illustrate our age-specific training methods and how we help facilitate your athlete's growth–not inhibit it. 

There is something in the athletic and strength training world called, "accumulation of training years." This means the more time spent training and practicing skills, the more results and progress you'll see as time passes. Basically, the more time put in now–the better the end pay off. 

We have three aspects we focus on with your mite or squirt, these are...

  1. General coordination

  2. Flexibility

  3. Speed (reaction time) 

These are all key fundamentals to a young athlete's growth as he/she develops, certain things like coordination become increasingly hard to develop as you age. This being said, the work we do is done to increase the efficiency of your athlete's abilities as they grow. We're priming them for an easier transition to future training and higher levels of play. 

General coordination is done through things like animal flow, tumbling drills and various balance drills we've constructed. These drills also teach body awareness something so key for the athlete whose sport has multiple demands. 

The best way to stay flexible is to never lose it. Younger athletes already have a tendency to be naturally flexible, this is key for developing good habits for their future. We work on improving what they already have and incorporate body awareness aspects. 

The aspect of speed we focus on is more than doing sprints and making your athlete run ladders (anyone can do that). We realize that reaction-time speed is something that is harder to learn as you age, we focus on combining multiple aspects of different skills into one. Examples include, tumbles to one-leg getups, animal flow with frog stands (tripods), beginner jump drills and many more. 

When your athlete trains with us it's more than just going to an off-ice session. It's investing in their future, their future of growth and athletic development. There are aspects of athleticism that become increasingly harder to learn with age, don't miss your athlete's opportunity for optimal growth. To get a better idea of the images above check out the video below! 


Post-Activation Potentiation

The theory and practice of Post-Activation Potentiation (PAP) revolves around prepping the nervous system for heavier maximal loads. This is known as Post-Tetanic Facilitation, this states if you lift a heavy amount usually a single, double or triple-you'll be able to lift a heavier amount with a higher rep range (ex: you'll be able to lift a heavier 6 rep after a heavy single, as opposed to just doing 6's) or create more power if you're doing a plyometric. In summary it's the method of priming the nervous system by creating a more effective neural drive.

When working with our athletes we facilitate this into the programs of some of our most elite players. They don't realize it at the time, but they're practicing a method that has long been used to create power and strength increases in a plethora of athletes. Hockey players have a demand for strength and speed in their game, thus making our form of PAP a useful tactic for increasing both at once.

An example of PAP we use with our athletes...

A1. Back squat - 3 reps, 40X0, 10 sec rest, 8 sets

A2. Depth jump - 6 reps, X, 4 min rest, 8 sets

Another example might be...

A1. High handle sled push - 10 meters, X, 0 sec, 10 sets

A2. Sprint - 10 meters, X, 3 minute rest, 10 sets

This example includes a heavy strength movement (3 rep back squat) and a plyometric (depth jump), both effective for hockey players. We combine these movements to increase a player's recruitment of muscle fibers when producing power. It's important to point out the rest time in-between each set--make sure to take a longer rest after the second movement when practicing PAP. The reason for this is the increased demand on neural drive, the body needs adequate rest to keep performing at an efficient rate.

PAP can be an effective change up when increasing one's strength/power production. It can be used combining different movements other than the one's used above (ex: 1 rep back squat, followed by a 6 rep back squat). It's also important to note that this method should be used sparingly, it's taxing on the nervous system and should be used strategically with your in/off-season schedules--this will help avoid burnout or any form of strength backtracking.

Important takeaways

  1. Use sparingly, there's a time and place in everyone's training program when PAP could be more or less effective.
  2. Allow adequate rest time.
  3. Combine movements that benefit and facilitate well together.
  4. If you're new to lifting this method won't benefit you as much as an advanced, trained athlete.


6 Movements to Build a Monster Grip

Grip strength is one of the most important components in all areas of sports. Whether it be staying strong on the puck, handling a baseball bat, squeezing a ball or wrapping up a tackle—all of these require a strong grip. Younger and older athletes both can benefit from strengthening their grip, younger will build a base and older will build from what they’ve already developed (which might illuminate weak areas). 

Grip is one of the limiting factors when it comes to lifting and performing. A limiting factor is something that will physically stop you from progress, even though other factors might have the ability to progress. In translation, you have an extremely strong back that will allow for a heavy deadlift, although your grip strength is lacking and you can’t hold the weight you’re trying to lift. While your back is willing and capable, you physically can’t because of your lack of grip strength. This is why it’s key to build your grip, your body can only progress if every part of it is in sync working together. 

“What about using straps?”

Strap .jpg

 While these are great for handling heavy weight, straps often play a role as a crutch to an athlete. While there are exceptions to using straps, avoid them when performing normal lifts, they shouldn’t be a go-to. 

What we’ve done at Institute 3E is observe over the course of the years what exercises and movements build the best grips. These are movements we practice with our athletes and movements that will allow for growth at any age or athleticism.  

1. Rope Climbs. 

Why? Rope climbing is great because it requires a pulling movement, stabilization and coordination. Not only does climbing a rope require the strength to hold your body weight, but it requires a strong grip to stabilize on a moving object. 

How? If rope climbing is out of the equation for you and you simply can’t perform the movement, perform rope holds. Work on holding your body weight up with a set count, for example holding your body up for a 30 second increment—work your way up until you’re able to climb. 

Rope Grip Close up.jpg
Rope Climb.jpg

Remember. When climbing the rope try to work your way up to climbing without legs, this is a true feat of upper body and grip strength. Also, when climbing use your feet as a tool not a crutch, the use of feet shouldn’t be the only reason you can climb. Lastly, don’t slide down the rope when at the top, this not only will burn your hands, but half of the battle is continuing the climb on the eccentric (down phase) part of the climb.  

  1. Peg Board. 

Why? While the peg board isn’t common at most gyms, it’s an amazing tool for building at athlete’s grip and upper body strength. It requires you to maintain a fixed grip on the peg that can support your bodyweight and upwards momentum. 

How? Peg board like rope climbing is a skill that needs to be trained, it’s not east to perform your first try. If you can’t climb without risk of injury, do peg holds. Hold yourself up on the board with fixed arms and grips—do this for an amount of time until you can climb on your own. 

Peg Board Close Up.jpg
Peg Board.jpg

Remember. To perform the peg board only when you’re ready and capable to climb on your own, it’s always a good idea to have someone with you as well. Keep your upper body tight so you avoid swaying and completely losing control of your position when climbing. Also, avoid using your feet to help push off and climb the wall. 

3. Fat Grip Chin-up/Pullup. 

Why? FYI: A chin-up is when your palms are facing you, pullups your palms face away and arms tend to be a little wider. These are a fundamental movement, but offer massive amounts of growth. When doing either of these movements with fatter grips your forearms and hands will be forced to do more due to the inability to wrap your hands and get a firm grip. 

Chin Above Chin Up .jpg
Long Arm Chin up .jpg

How? A primary goal for both of these movements is being able to do multiple reps with your bodyweight getting full ROM (range of motion). This means you have long arms on the eccentric part (down motion) and getting your chin above the bar when pulling yourself up. The full range of motion should be your main goal with this exercise, once you’ve achieved multiple reps with bodyweight move to adding weight around your waist. 

Long Arm Pull Up.jpg
Pull Up Chin Above .jpg

Remember. This movement is useful when performed properly—don’t rush to adding weight around your waist if you can’t do reps with long arms and chin above the bar. Also, normal bars can be used to progress and build your strength to fatter grips, if you can’t do fat grips, don’t fret and start on normal bars. 

4. Fat Gripz Deadlift. 

Why? The deadlift itself is a feat of strength, when adding a fatter grip it changes the complete dynamic of the lift. It no longer relies on brute strength to pick up the bar off the ground, it requires a strong grip to even get the bar moving. If you’re curious about your grip strength with a heavier weight, try deadlifting with fat grips. 

Fat Grip Deadlift.jpg
Fat Grip Close up.jpg

How? It’s key to remember when performing this deadlift that we’re going to have a “clean” grip. This means both palms are facing down, we’re not doing the offset grip—offset increases chance of a torn bicep and will hinder symmetrical forearm development.

Remember. Form matters. If you’re not comfortable with deadlifting to begin with, start without using fatter grips, once you’ve perfected the form you can begin to experiment. This movement isn’t about your ego, don’t be surprised if your deadlift drops a substantial amount when switching up to a fatter grip. Take it slow and make sure you’re performing the proper lifting mechanics—good form is the quickest way to grip progress with this movement. 

5. Snatch Grip Deadlift. 

Low Sit Snatch DL .jpg

Why? While this movement could be argued about it’s place on the list, there’s no denying that gripping a barbell snatch grip style requires a strong grip. With a wider grip we won’t have the same strength as something more conventional. The reasoning is our hands don’t have the same amount of surface area to apply force on the bar, along with the fingers having less ability to wrap in a hooking motion.

Snatch grip stand up.jpg

How? The snatch deadlift will force you to sit a little lower than a conventional deadlift, solely for the reason it wouldn’t be optimal to leave out your legs in the lift (your back would be to rounded). This being said, with the legs and back being able to work in sync the amount of weight that’s lifted can only match what the grip can handle. 

Remember. If you can’t perform an obscene amount of weight, it’s okay. When you pair this exercise with other grip focused lifts you’ll progress quickly, the snatch grip requires a different dynamic when applying force to a bar. Along with the normal fatter grip deadlift,  don’t let your ego dictate the mechanics of this lift! 

6. Farmers Walks. 

Farmers Walk .jpg

Why? Farmers walks are possibly one of the most effective ways to test your grip strength. You’re supporting a high amount of weight on each arm and walking a set distance. Not only do you have to have the strength to lift the weight, but you have to maintain good posture as well. The walk adds extra tension on the grip to maintain a fixed stable position during movement.

How? When performing farmers walks it’s key to remember that posture is important, if the weight is pulling your chest down or causing you to stumble—it’s too heavy. If you’re not used to this movement, start a little lighter and add weight/distance as you get stronger and more competent.  

Remember. If the actual farmers walk bars aren’t a resource for you, use barbells or dumbbells they both can be used to achieve the movement. Progress at your own speed and don’t be afraid of calluses, they’re a small price to pay for building a beast grip! 

These forearm building movements are great to add to any lifting arsenal. Keep your eyes open for another article featuring more grip based movements in the future. And always, if you have any questions or concerns ask away!